In our daily development process, we are writing lots of codes and then we click to run button of our preferred IDE in order to run our apps. After that, IDE runs our app and we are generally not aware of what’s happing behind the scene at that moment. In this medium story, i try to look closer this building process that happen after when we click to run button or building app without run.
Before everything, lets talk about .NET apps compilation lifecycle. In development, after writing our high-level language codes with C#, F# or other .NET supported languages, we compile our apps by using appropriate language compiler such as Roslyn for C#. In this step, compiler generates CPU-independent managed code which is known as MSIL (Microsoft Intermediate Language) code and metadata that contains information about types and references are stored in .exe for runnable apps or .dll for library projects which are known as PE(Portable Executable). But IL doesn’t run on CPU because CPU needs to native code such as Arm64 for execution. In this time, CLR comes into scene. When user runs .NET app, operating system invokes CLR (Common Language Runtime) and JIT(Just in Time Compiler) inside of CLR, compiles PE code to CPU-specific native code.
There are two option for compilation model. These are JIT and AOT. .NET supports both of them. On Android, macOS, and Linux environments JIT is default and AOT is optional. On iOS, AOT is mandatory.
For summarize these steps, lets have a look the following picture,
 |
|---|
| Picture from https://media.geeksforgeeks.org |
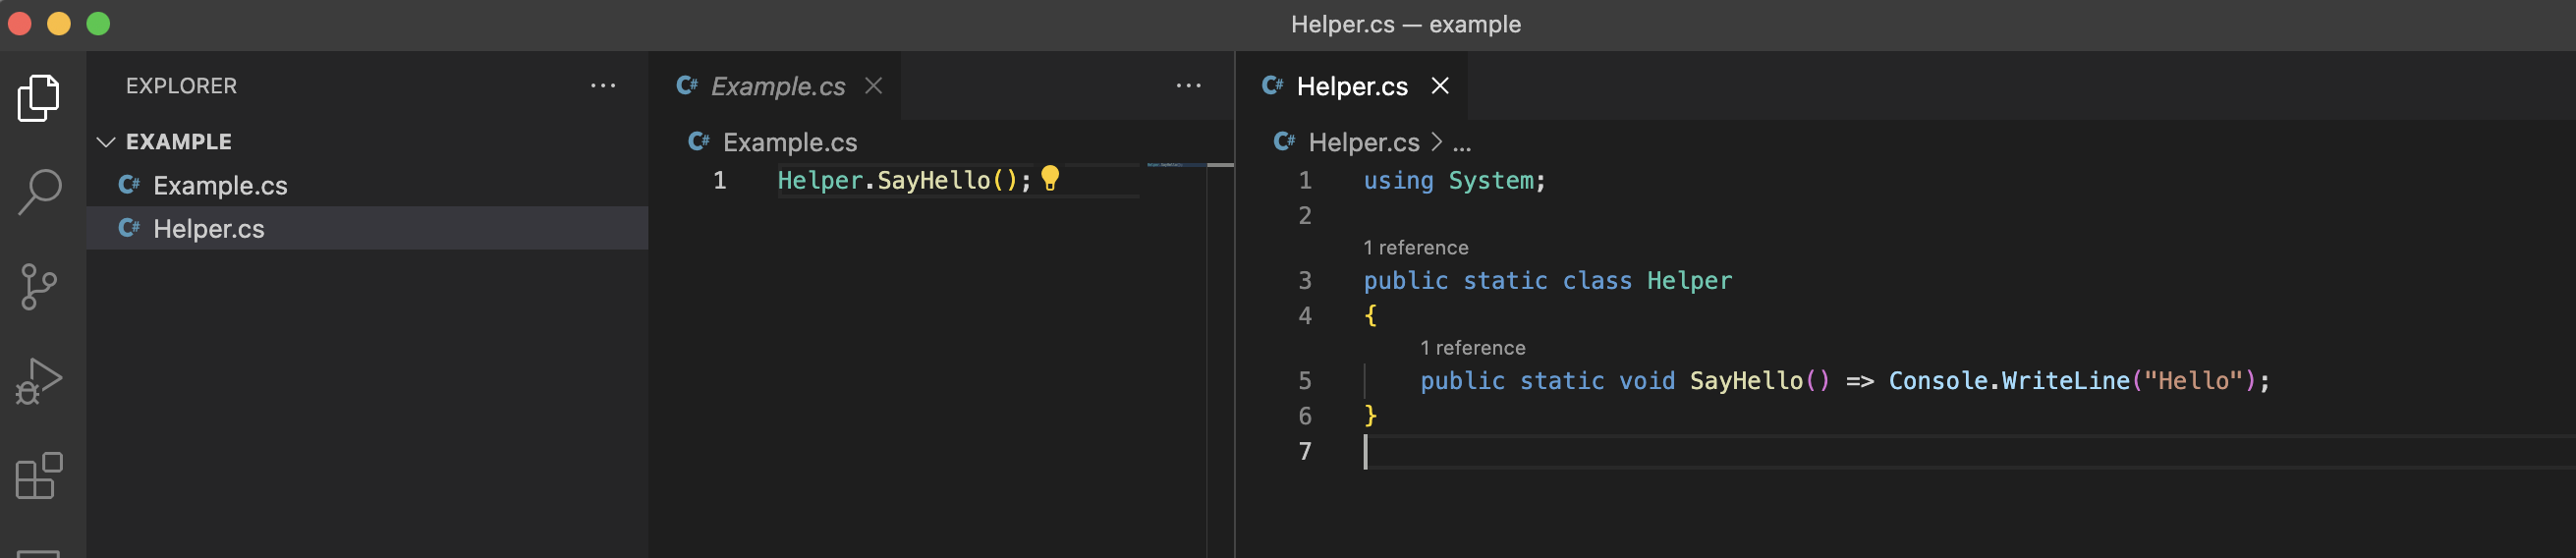
Let’s make a quick example for demonstration purpose of above steps. I create Example.cs file which is entry point of the app and Helper.cs file contains helper methods whose are used inside of the our main Example.cs file as like below;
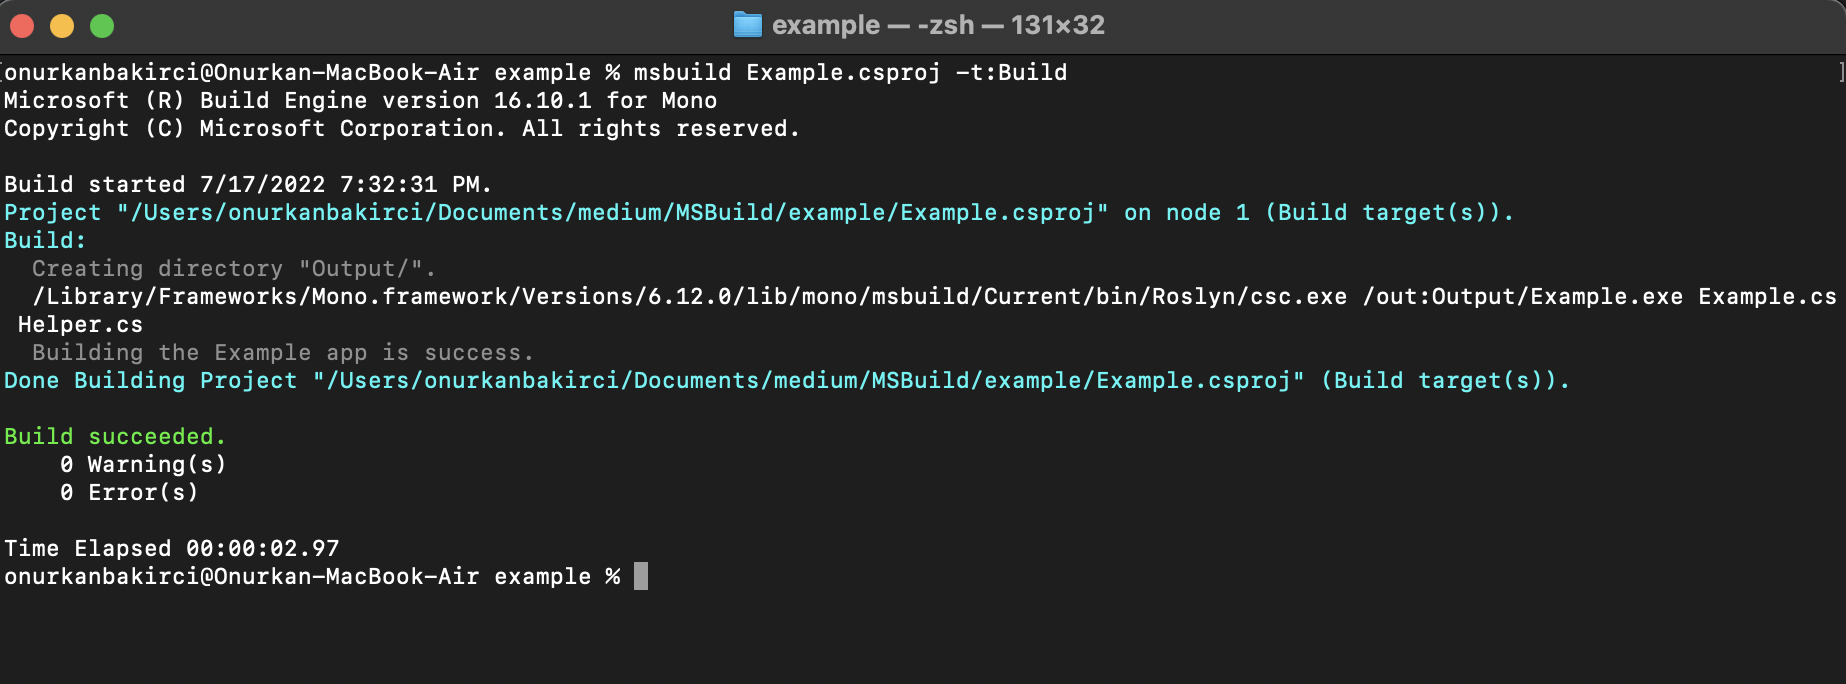
I am opening terminal in this path and then i am firstly generating Helper.cs library’s .dll file. Then, i am generating a .exe file referencing Helper.dll file. After these two generation steps, C# compiler generates an Example.exe executable contains MSIL codes inside of it. And then, i can run the .exe file by using mono(because of macOS environment). These steps are shown in the following image;

In the above example, i try to demonstrate manually basic steps for running a .NET app. But imagine that we have a big commercial project and in this project, we have a hundred or a thousand file consist of source code files, folders, resources like images or xml etc. Building and running the app manually like the process shown above will be extremely hard for developers as you can predict. This time, MSBuild comes into play.
Microsoft Build Engine which is known as MSBuild is a platform for building .NET apps. If you have ever before look closer to file structure of .NET apps, there is a project file contains XML based configurations of MSBuild and its extension ends with *proj such as .csproj file for C# based projects, .vbproj file for VBasic based projects.
MSBuild XML structure is pretty simple, extensible and understandable. Even if you don’t have experience with MSBuild, you can easily interpret instructions of it. It has core elements like Item, Target, Property and Task and also MSBuild consist of three phase;
- Initial startup
- Evaluation
- Execution
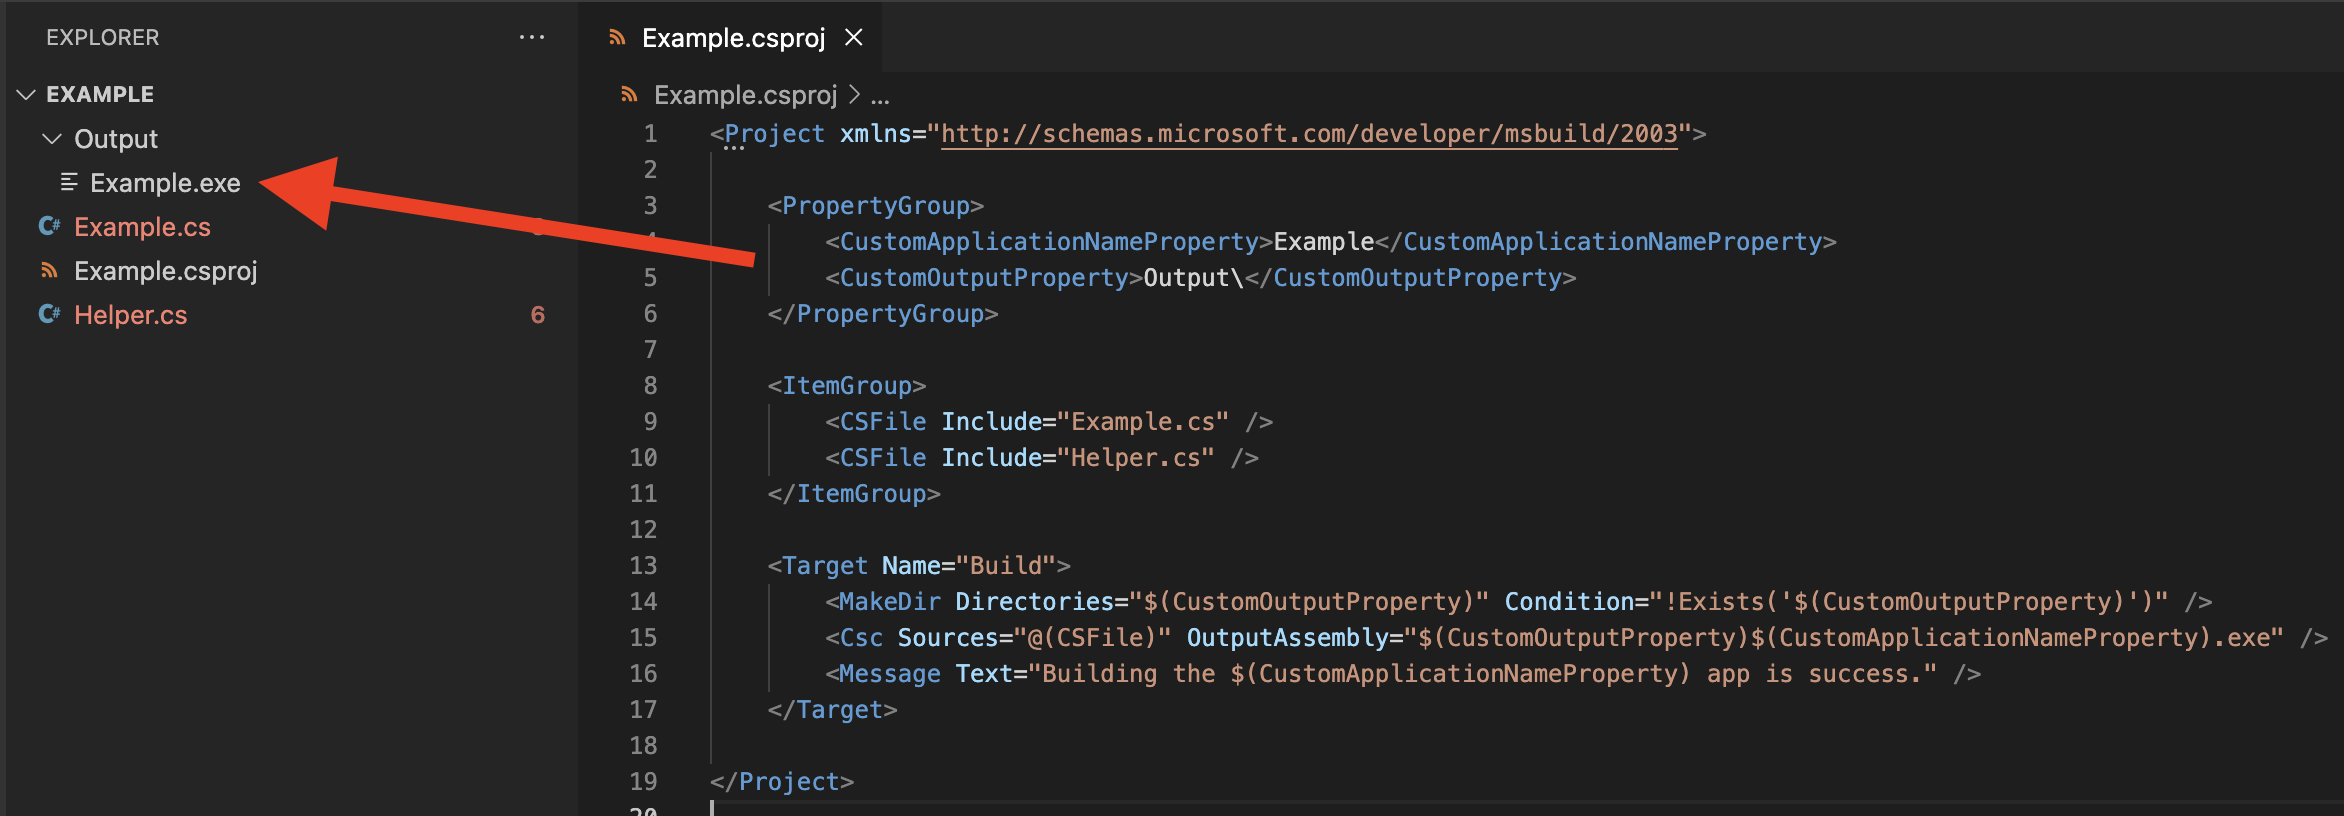
Let’s try to build the app (shown in the above example) with MSBuild. In order to talk with MSBuild, we need a project file. Our project consist of C# source codes, so let’s create an empty Example.csproj file in order to define XML based configurations like below;
In the above configurations i define two custom Property inside of the PropertyGroup tags.
CustomApplicationNamePropertydefines application output file name.CustomOutputPropertydefines application output path.
Then i define Item inside of the ItemGroup tags.
CSFiledefines which files will be included to application.
In the last part of configurations, i define Target group to tell MSBuild which actions will be done.
-
MakeDirdefines directory which will be created at the build target. It hasDirectoriesattribute in order to define location of directory andConditionattribute in order to define in the which scenarios this task will apply. -
Cscdefines which files are will be compiled by Visual C# compiler. It hasSourcesattribute in order to target source files andOutputAssemblyattribute in order to define output of the compiled source codes. -
Message defines console message output.
Properties are name-value pair which are described as scalar. Items are list of items which are described as vector. We use @() special character to reference vector ItemGroup items and $() special character to reference scalar PropertyGroup properties.
After defining configurations in the project file we can build the app from terminal with the command;
msbuild Example.csproj -t:Build
Terminal output after execution of the command;
We can see that app was builded successfully by MSBuild and application output created at the Output\ directory as defined in the configurations.
We can also add different Target depends on other Target s to enhance capabilities for different building scenarios.
Microsoft.Common.targets and Microsoft.Common.props are both imported by .NET project files explicitly or implicitly in SDK-style projects. And these two files also have other imports like Microsoft.Common.CurrentVersion.targets .We can define our properties, tasks and other things inside of
Directory.Build.props(imported by Microsoft.Common.props)Directory.Build.targets(imported by Microsoft.Common.targets)
files. We can also define these configurations our custom file and then we can import them. Let’s make this process for our above example for modularity and simplification.

So, MSBuild is very powerful tool for customizing build process, adapting different environments and so on.